You are using an out of date browser. It may not display this or other websites correctly.
You should upgrade or use an alternative browser.
You should upgrade or use an alternative browser.
Mortal Kombat HD Remix with MUGEN
- Thread starter Spawn16
- Start date
I've provided everything assuming 60 frames per second. So yeah you probably have too many frames. I assume too many frames is better to cut down from rather than not having enough.
I'll take a look later to the monks and flames animations.
I can't remember well but i think flames have twice every frame. and about monks there are a lot of sprites..
I got some vids up on youtube showing how some of our work is done.
Biped animation with 3D studio max.
http://www.youtube.com/watch?v=2xcunNLllkk&list=UUhDa7-LeLEDuk7xkf7wHCbg&index=5&feature=plcp
Biped animation with 3D studio max.
http://www.youtube.com/watch?v=2xcunNLllkk&list=UUhDa7-LeLEDuk7xkf7wHCbg&index=5&feature=plcp
AntrAcsA
Member
I got some vids up on youtube showing how some of our work is done.
Biped animation with 3D studio max.
http://www.youtube.com/watch?v=2xcunNLllkk&list=UUhDa7-LeLEDuk7xkf7wHCbg&index=5&feature=plcp
:hail: i want to be that good too,
Last edited:
Beautiful work Bleed! Amazing attention to detail.
Quick video of what the UMK3 model has now in mugen.
It looks fantastic Bleed but i think you can improve some things:
In the neutral jump the front knee looks strange, I haven't compared with arcade but I'm sure it's different
Same happens with the jumping punch with the arm.
Standing HK looks too fast
And the forward/backward jump the "human ball" looks too big. This apply to MK1 Scorpion too
In the neutral jump the front knee looks strange, I haven't compared with arcade but I'm sure it's different
Same happens with the jumping punch with the arm.
Standing HK looks too fast
And the forward/backward jump the "human ball" looks too big. This apply to MK1 Scorpion too
Bleed,
I'm wondering as if you can record some video of the skinning process for Raiden. That would be so valuable as a learning tool for me personally. I'm not quite sure where to put those twisty bones to create a mesh that doesn't lose volume.
I think if I saw how you did that and how you did the skin weighting that I could probably start helping out in the animation department since I'm pretty familiar with animation in 3ds Max. If it slows you down too much perhaps you can send me a 3ds Max file to play with at one point or another.
Sure, hopefully I'll remember to do it.
The general idea is this, using the Upper arm as an example.
If you are using the biped skeleton, they are added with a simple option in the creation menu.
If you are making a custom rig, you make one bone like normal for the upper arm, and link another bone over it. Like one tube inside another. Set your constraints for the upper bone, closest one to the clavicle. Align it to the upper arm's pivot and axis, make it look in the same direction with a look at constraint, looking at the fore arm bone.
Add a rotation constraint to it, and set it's weight to follow 50% rotation for the upper arm and 50% rotation of the clavicle.
When you twist the upper arm bone, the twist bone will twist half as much. When you move the main upper arm bone, the twist bone will go with it.
Using the skin, weigh the lower part of the upper arm to the main upper arm bone, so it rotates more toward the elbow. Set the upper half of the upper arm to the upper arm twist bone.
When you twist the upper arm bone, the part closer to the fore arm will twist more and you won't get so much of a pinch at the shoulder.
I'd really like to know how this is done with CAT. Especially if it is practically automatic. Do you use skin weight mirroring?
Sure, hopefully I'll remember to do it.
The general idea is this, using the Upper arm as an example.
If you are using the biped skeleton, they are added with a simple option in the creation menu.
If you are making a custom rig, you make one bone like normal for the upper arm, and link another bone over it. Like one tube inside another. Set your constraints for the upper bone, closest one to the clavicle. Align it to the upper arm's pivot and axis, make it look in the same direction with a look at constraint, looking at the fore arm bone.
Add a rotation constraint to it, and set it's weight to follow 50% rotation for the upper arm and 50% rotation of the clavicle.
When you twist the upper arm bone, the twist bone will twist half as much. When you move the main upper arm bone, the twist bone will go with it.
Using the skin, weigh the lower part of the upper arm to the main upper arm bone, so it rotates more toward the elbow. Set the upper half of the upper arm to the upper arm twist bone.
When you twist the upper arm bone, the part closer to the fore arm will twist more and you won't get so much of a pinch at the shoulder.
DjangoJustin
New member
Shit just got technical...

Ok SubZero's Ice Projectile Animation is live.
http://www.jtresca.com/test/Final_SUBICE.zip
view in quicktime player with "loop" setting on. Bare in mind that less is more here, I'm trying to stay at 40 frames or less for these animations since they happen fast.
http://www.jtresca.com/test/Final_SUBICE.zip
view in quicktime player with "loop" setting on. Bare in mind that less is more here, I'm trying to stay at 40 frames or less for these animations since they happen fast.
I think it looks great, more animation to the vapor would be nice but like you say, it moves so fast you can't tell it's missing.
I played with different vapor times, and yeah you just won't see it. It sucks because the portal and vapor effects I made look so awesome if it was a minute long animation, but you just can't see any of it in 1.25 seconds.
woah! nice mock-up screen cap . . !
This amazing job man!!!!!!!!!!!!!!
Beautiful graphics, its amazing!!
Perfect chars!!!
DjangoJustin
New member
The animation looks kind of lifeless to me, to be honest. I understand that the blast will be on screen very briefly, but some subtle animation would improve it greatly, I think.
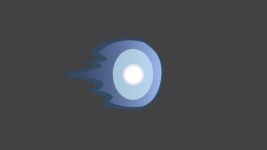
Would it be possible to add a pulsing type effect to the blast? Here is an old animation I made in flash that sort of illustrates what I'm talking about. Excuse the low-quality gif.

Would it be possible to add a pulsing type effect to the blast? Here is an old animation I made in flash that sort of illustrates what I'm talking about. Excuse the low-quality gif.

I see what you are saying..but the animation as I have it is really very accurate to the original. I'm not sure pulsing is right for this. We will need Interloko to drop this animation in to really get a feel for any tweaking.
That being said, have a look at Scorp's spear:
www.jtresca.com/test/ScorpSpear.rar
need quicktime to view it and you should put it on loop for the best effect.
That being said, have a look at Scorp's spear:
www.jtresca.com/test/ScorpSpear.rar
need quicktime to view it and you should put it on loop for the best effect.
Last edited by a moderator:
